Reversible Ribbed Scarf: Free Beginner Crochet Pattern
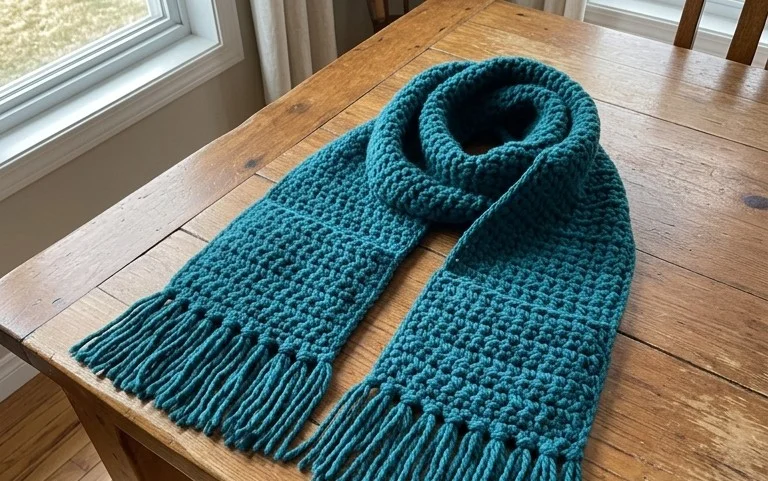
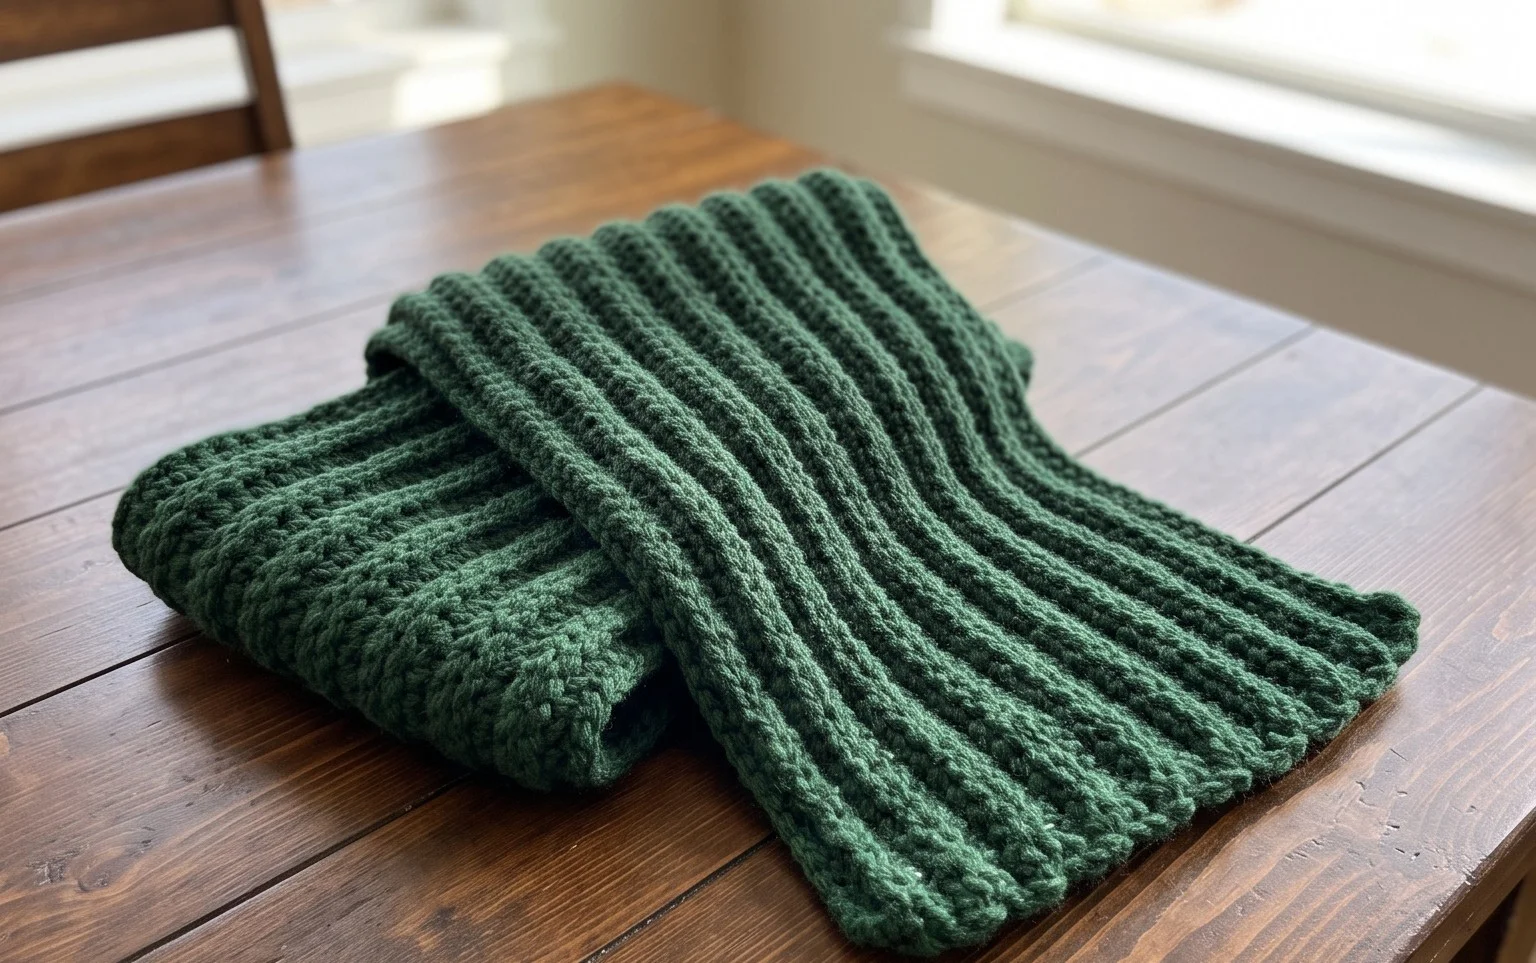
A thick, squishy fabric defines this simple scarf, creating a squarish ribbing that looks identical on both the front and back. The design relies on the front-post double crochet stitch, which provides a satisfying amount of texture while keeping the project moving quickly. Because the stitches are worked in columns, the scarf stays soft and drapes well around the neck without feeling stiff or bulky. You will find this pattern helpful if you want a reliable gift to make for friends or a meditative activity to occupy your hands while listening to an evening podcast.
Why You’ll Love This Pattern
The Classic Crochet Granny Square is the foundation of countless heritage blankets and modern garments alike. This specific pattern relies on the standard double crochet cluster, making it an incredibly rhythmic and meditative project that you can pick up or put down at a moment’s notice. Because it works from the center outward, you can easily control the final size of the square by adding or stopping after any round. It is also a perfect project for using up partial skeins of leftover yarn, as each round can be worked in a different color to create a playful scrap-busting effect.
I learned to crochet using this exact pattern and found the instructions clear enough that I finished my first square in under an hour without getting confused by the corners. — Sarah, crochet hobbyist
Pattern Overview & Skill Level
- Skill Level: Beginner
- Approximate Time: 30 to 45 minutes per 6-inch square
- Construction: Working in rounds starting from a center ring
- Finished Dimensions: Customizable; the base pattern provided creates a 6-inch square when using worsted weight yarn
Materials & Supplies Needed
- Yarn: Worsted #4 weight, acrylic or wool blend, approximately 20 yards per square.
- Hook Size: 5.0 mm (US H-8).
- Notions: Tapestry needle for weaving ends, sharp scissors.
- Yarn Substitutions: You can use DK weight yarn for a smaller, tighter square, though you may need to add additional rounds to reach your desired size. Bulky weight yarn will create a larger, chunkier square and requires a 6.0 mm hook.
Stitch Guide & Abbreviations (US Terms)
- ch: chain
- st: stitch
- sl st: slip stitch
- dc: double crochet
- cl: cluster (a group of 3 dc worked into the same space)
- sp: space (the gap created by chain stitches)
Step-by-Step Pattern Instructions
Granny Square Body
- Rnd 1: Start with a magic ring or chain 4 and sl st to the first chain to form a ring. Ch 3 (counts as first dc), work 2 dc into the ring. Ch 2, *3 dc into ring, ch 2. Repeat from * 2 more times. Join with a sl st to the top of the initial ch 3. (12 dc, 4 ch-2 sps)
- Rnd 2: Sl st into the next 2 sts and into the first ch-2 sp. Ch 3, 2 dc, ch 2, 3 dc into the same corner sp. *Ch 1, (3 dc, ch 2, 3 dc) in the next ch-2 sp. Repeat from * 2 more times. Ch 1, join with a sl st to the top of the initial ch 3. (24 dc, 4 ch-2 corner sps, 4 ch-1 side sps)
- Rnd 3: Sl st into the next 2 sts and into the corner sp. Ch 3, 2 dc, ch 2, 3 dc in the same corner sp. *Ch 1, 3 dc in the next ch-1 sp, ch 1, (3 dc, ch 2, 3 dc) in the next corner sp. Repeat from * 2 more times. Ch 1, 3 dc in the last ch-1 sp, ch 1, join with a sl st to the top of the initial ch 3. (36 dc, 4 ch-2 corner sps, 8 ch-1 side sps)
- Rnd 4 and beyond: Continue in established pattern, working 3 dc in every side ch-1 space and (3 dc, ch 2, 3 dc) in every corner ch-2 space, with a ch 1 between each cluster, until the square reaches your desired size.
Finishing
Once you reach the final round, fasten off leaving a 6-inch tail. Pull the tail through the final loop to secure. Use your tapestry needle to weave the yarn tail back and forth through the back loops of the stitches on the reverse side of the square. Trim any excess yarn close to the fabric for a clean finish.
Care & Washing Instructions
- Machine wash your finished squares on a gentle cycle in cool water using a mild detergent.
- Lay the squares flat on a clean towel and reshape them while damp to ensure perfectly straight edges.
- Avoid using a tumble dryer, as high heat can shrink acrylic fibers or cause natural wool fibers to felt unintentionally.
Pro Tips & Common Mistakes to Avoid
Maintaining consistent tension is vital for a square that lays flat; if your stitches feel too tight, go up one hook size. Always place a stitch marker in the first chain of your starting ch-3 to help you identify the closing point for the round. When switching colors, join the new yarn in a corner space to keep the color transition seam hidden along the side of the square. Increasing the number of rounds will naturally increase the amount of yarn required, so weigh your yarn before and after a round if you are working with limited supplies.
Frequently Asked Questions
Can I use a different yarn weight for this pattern?
Yes, you can use any yarn weight provided you use the hook size recommended on the ball band. Your square will simply be larger or smaller than the dimensions provided.
Why are the corners of my square curling?
Curling usually happens when your tension is too tight or if you have skipped the chain stitches in the corners. Ensure you are working a full ch-2 in every corner space to give the fabric room to turn.
Is this pattern suitable for complete beginners?
Absolutely. It uses only basic stitches and the repetition of the clusters makes it very easy to memorize after just one or two rounds.
Can I sell items made from this pattern?
You are welcome to sell finished items created from this pattern. However, you may not redistribute, sell, or claim the pattern text or photography as your own.
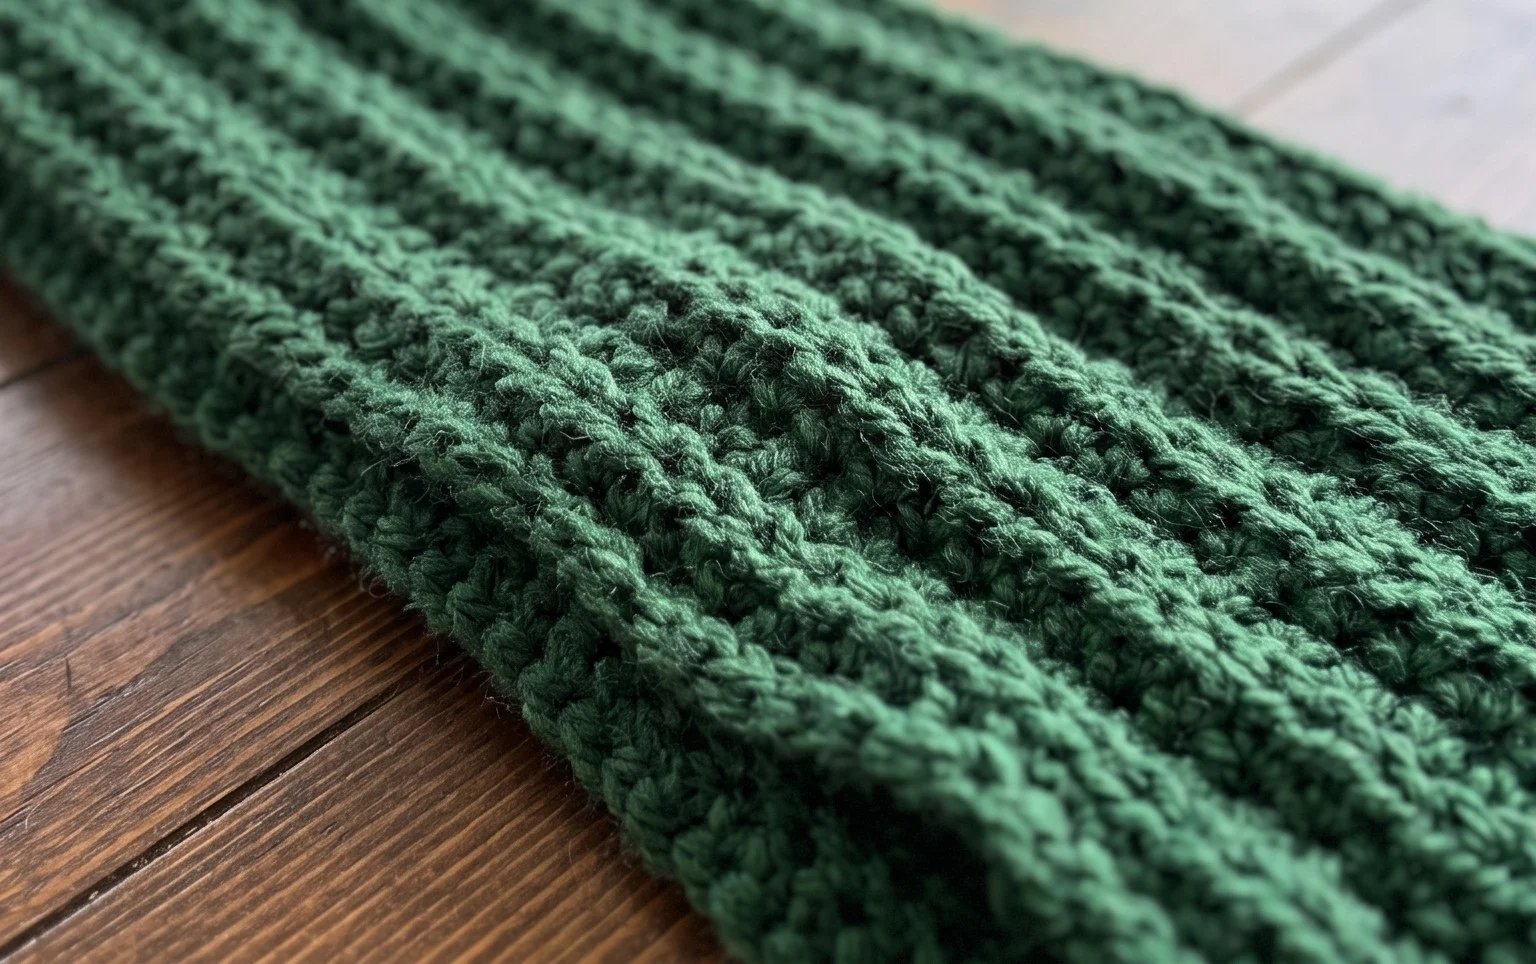
Finishing this scarf leaves you with a warm, handmade accessory that works for anyone on your gift list. You might consider using a variegated wool yarn for your next version to see how the shifting colors emphasize the deep texture of the ribbed columns. Please share a photo of your finished work online so others can see how your color choices turned out. Feel free to browse through the rest of the collection on the blog to find your next project. Happy stitching and enjoy the cozy result.