Easy Crochet Celtic Weave Basket Free Pattern
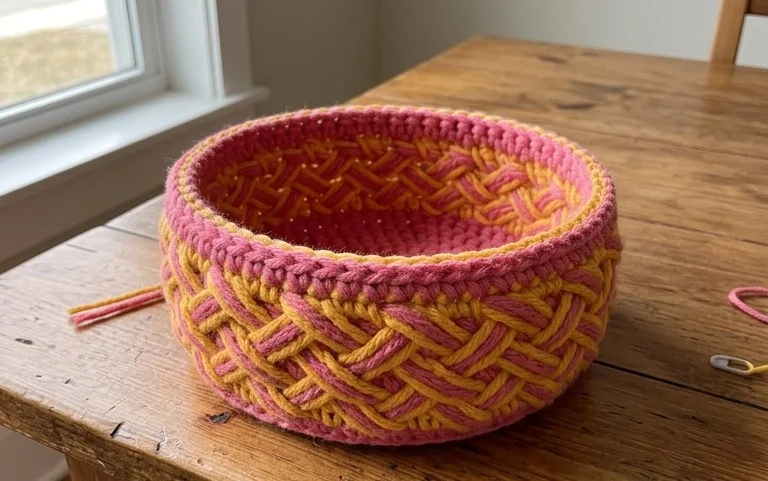
Dense cotton yarn creates a structured look that stands up on its own, making this woven-style container a sturdy addition to any cluttered desk or shelf. You will find that the interlocking post stitches create a thick fabric that hides contents well while offering a soft, tactile surface. This project is suited for makers who want to move past basic flat squares into three-dimensional shaping. Working through the process, you learn how to manipulate post stitches to mimic a traditional basket-weave look without the need for complex loom tools. It provides a rewarding challenge that results in a functional piece you can use for years.
Why This Project Is Worth Making
This simple crochet drawstring pouch uses a sturdy base and a shell-stitch texture that keeps small items secure while remaining flexible enough to open easily. It is an ideal weekend project because it relies on basic stitches like double crochet and chain spaces, allowing you to finish the entire piece in one or two sittings. Because it uses less than 100 yards of medium-weight yarn, it works perfectly for clearing out leftover scraps from larger projects. The drawstring closure prevents contents like stitch markers, lip balm, or coins from falling out, making it a functional everyday accessory.
I managed to finish this pouch in a single afternoon while listening to a podcast. The pattern is clear, and the shell stitches look much more advanced than they actually are. I have already made three for my friends.
— Sarah, intermediate crocheter
Pattern Overview & Skill Level
- Skill Level: Beginner
- Approximate Time: 2 to 3 hours
- Construction: Worked in joined rounds starting from a flat circular base, moving into a textured body, and finishing with a simple chain-loop border.
- Finished Dimensions: 5 inches tall by 4 inches wide when laid flat.
Materials & Supplies Needed
- Yarn: Worsted weight (#4), 100% cotton, approximately 80 yards. Cotton provides the structural integrity needed to hold the weight of small items without stretching out of shape.
- Hook Size: 4.0 mm / G-6. A slightly smaller hook than recommended on the yarn label helps create a dense fabric that prevents small items from slipping through gaps.
- Notions: Tapestry needle for weaving in ends, a locking stitch marker to track the start of rounds, and a length of twine or braided scrap yarn for the drawstring.
- Safe Yarn Substitutions: Acrylic worsted weight yarn is a suitable alternative if you prefer a softer feel, though the pouch will have more “drape” and may lose its shape over time. Wool or blends will also work, but keep in mind that wool may felt slightly if washed in high heat.
Stitch Guide & Abbreviations (US Terms)
- ch = chain
- st = stitch
- sl st = slip stitch
- sc = single crochet
- dc = double crochet
- Shell = 5 dc in the same stitch/space
- sk = skip
Step-by-Step Pattern Instructions
Base
- Rnd 1: Start with a magic ring. Ch 3 (counts as first dc throughout), work 11 dc into the ring. Join with a sl st to the top of the starting ch-3. (12 sts)
- Rnd 2: Ch 3, dc in same st, 2 dc in each st around. Join with a sl st to top of starting ch-3. (24 sts)
- Rnd 3: Ch 3, 2 dc in next st, 1 dc in next st, 2 dc in next st repeat from * to * around. Join with a sl st to top of starting ch-3. (36 sts)
Pouch Body
- Rnd 4: Ch 1, sc in same st and in each st around. Join with a sl st to first sc. (36 sts)
- Rnd 5: Ch 3 (counts as first dc), 2 dc in same st, sk 2 sts, sc in next st, sk 2 sts, shell in next st, sk 2 sts repeat from * to * until 3 sts remain. Sc in next st, sk 2 sts, 2 dc in same space as starting ch-3. Join with a sl st to the third ch of starting ch-3. (6 shells, 6 sc)
- Rnd 6: Sl st into the center st of the first shell, ch 1, sc in that same st, ch 3, sk next 2 dc and 1 sc, shell in the next sc, ch 3, sk next 2 dc and 1 sc, sc in center st of next shell repeat around. Join with sl st to first sc.
- Rnd 7-12: Repeat Rnd 6 until the pouch reaches the desired height.
Border and Finishing
- Rnd 13: Ch 1, sc in each st and ch around. Join with a sl st. Fasten off and weave in all ends.
- Assembly: Weave your chosen drawstring through the gaps created by the ch-3 spaces in the final rounds. Tie the ends in a knot to secure.
Care & Washing Instructions
- Hand wash in cool water with a mild detergent to prevent the cotton fibers from breaking down.
- Do not wring or twist the pouch; instead, lay it flat on a clean towel and roll it to remove excess moisture.
- Reshape the circular base while damp and allow it to air dry completely away from direct sunlight.
Pro Tips & Common Mistakes to Avoid
- Maintain consistent tension throughout the shell rounds; if your shells look loose, pull your yarn slightly tighter on the first and last dc of each shell group.
- Always place a stitch marker in the first stitch of every round when working in continuous spirals, though for this joined-round pattern, ensure you count your ch-3 as a stitch to keep your count accurate.
- Weave in your yarn tails by running the needle through the back loops of the stitches on the inside of the pouch; this keeps the exterior looking clean and professional.
- Adjust the size of the pouch by adding or subtracting increases in the base rounds, but remember that increasing the base size requires an additional multiple of 6 stitches for the shell pattern to align correctly.
Frequently Asked Questions
Can I use a larger hook for this pattern?
Using a larger hook will make the pouch significantly larger and the fabric much looser, which may allow small items like coins to fall out. Stick to the 4.0 mm hook for the best structural results.
How do I adjust the pouch to be taller?
You can easily increase the height by repeating the instructions for Round 6 until you reach your preferred size. Be sure to stop after a full repeat of the shell pattern so the top remains even.
Is this suitable for a total beginner?
This pattern is perfect for beginners who are comfortable with chain, single crochet, and double crochet stitches. The shell stitch is a simple combination of these basics.
Am I allowed to sell pouches made from this pattern?
You may sell items made from this pattern as long as you credit the original design. Please refrain from distributing the pattern text itself or claiming the design as your own work.
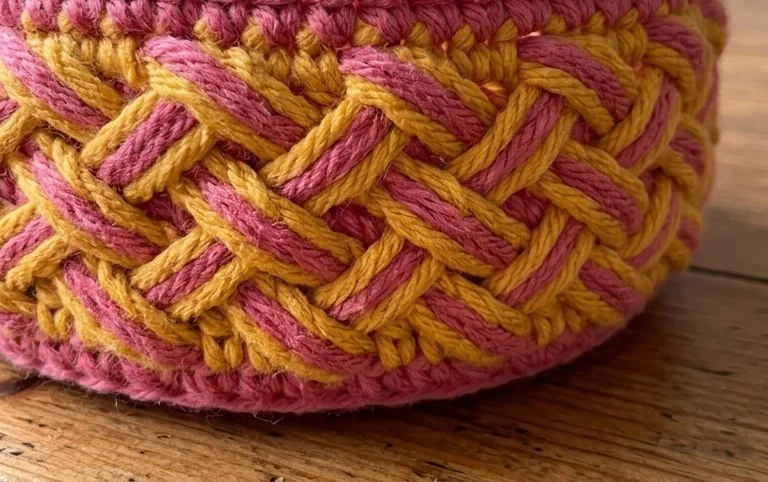
Seeing your handmade woven storage piece finished and holding your favorite notions brings a sense of accomplishment to any afternoon spent with a crochet hook. You might consider using a variegated cotton yarn next time if you want to emphasize the depth of the stitches or even holding two strands together for a much larger, heavy-duty floor basket. Post a photo of your finished work on social media to show off the texture and check out the rest of the blog for more patterns.